Will and Amy’s Permeable Paving Journey
When Will and Amy bought their property in a new residential development in Lincoln, near Christchurch, they envisioned creating a safe and fun outdoor area for their two young children. They wanted to transform the undeveloped outdoor area into something easy to maintain that would also add aesthetic and monetary value to their new home. After researching various options, they found that Natural Paving was the ideal choice. Natural Paving is simple to install, allowing them to divide the area into easily accessible sections for the whole family to use, creating a beautifully defined and functional outdoor space.
Ease of Installation with Natural Paving
One of the primary reasons Will and Amy chose Natural Paving was its ease of installation. They discovered that the process was straightforward, even for those with limited DIY experience. With Natural Paving, they could easily define different areas using various coloured stones, giving each section its unique character.
With the house having just been built, Will and Amy began by planning out their space, deciding which areas would be used for play, gardening, entertaining, and pathways. Once they had a clear vision, the installation process was a breeze. Natural Paving already has a layer of geotextile attached, so Will and Amy simply placed the pavers onto the compacted aggregate layer and filled. They found that the stones were easy to lay and secure, ensuring a smooth and stable surface. The use of different coloured stones added an extra layer of visual appeal, making each area distinct and inviting.
Creating a Playground Area with Permeable Paving

The first area Will and Amy tackled was the playground for their children. Safety was a top priority. With Natural Paving, they could provide a stable, flat area for slides and playgrounds to be securely placed. Having created an area with softer materials so it was safe for their kids, they defined the playground area with white pebbled pathways. This helped create an area that their children knew was a safe zone to play in. Natural Paving also provided excellent drainage, so there were no muddy puddles after rain, allowing the children to play outside year-round.
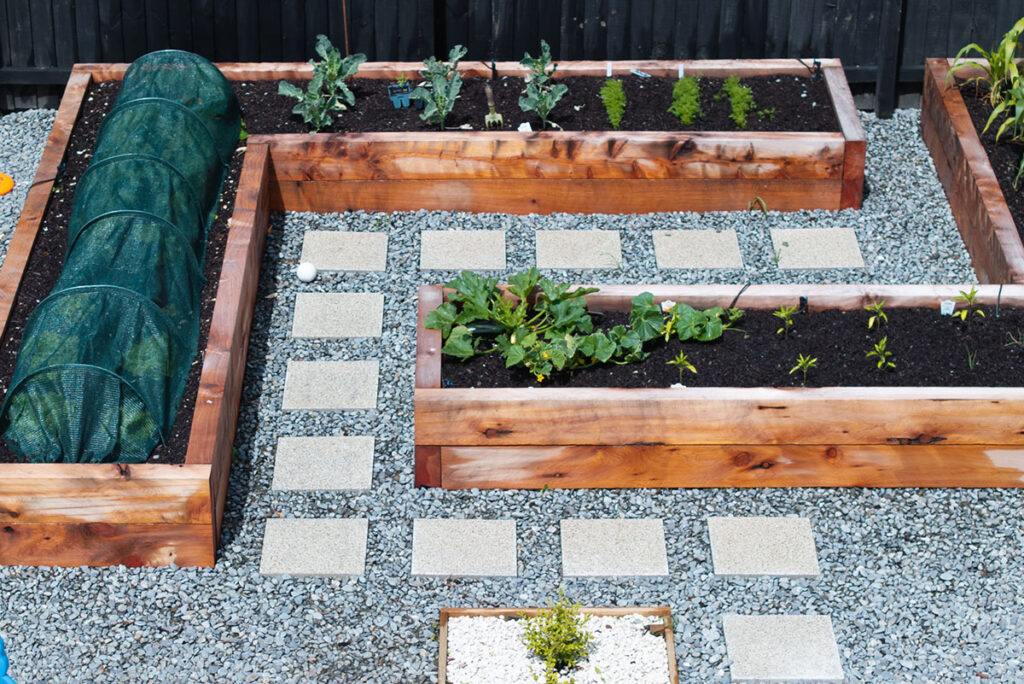
Next, Will and Amy focused on creating a garden area with raised beds. The permeable pavers allow for excellent drainage, preventing water from pooling around the plants, making it easier for them to nip out and pick a few herbs knowing they won’t be trudging through wet dirt. This not only enhanced the health of their garden but also made it easier to maintain. For this area, they filled Natural Paving with a grey stone, highlighting it with square pavers to mark a pathway between the raised beds. Natural Paving was simply cut to fit around the square paving stones, integrating them into the overall design.
Creating Pathways with Natural Paving Permeable Pavers
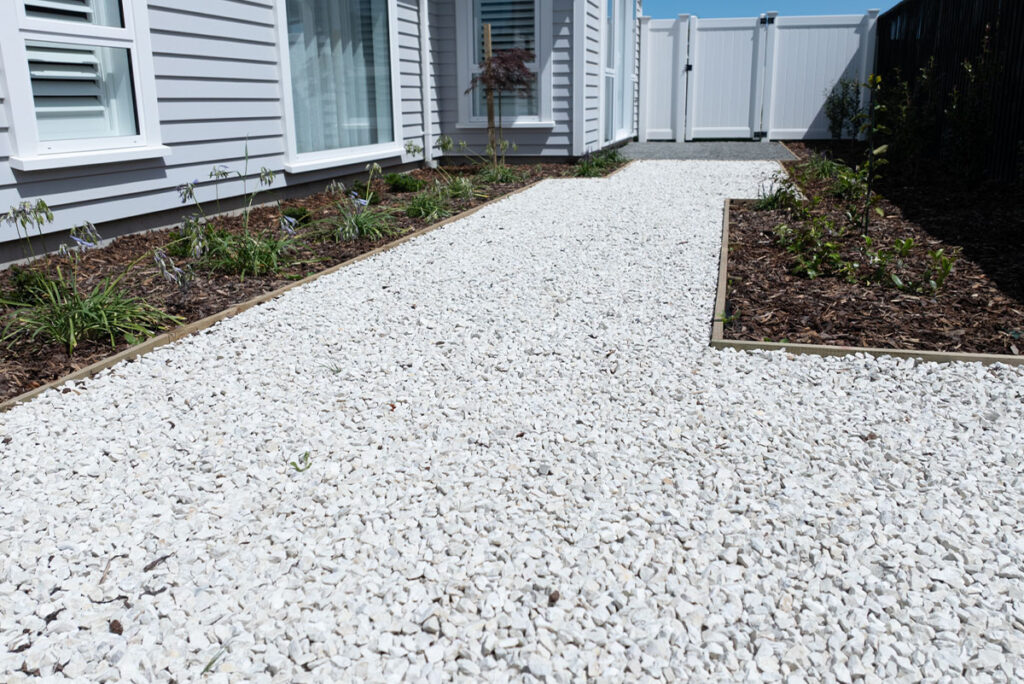
To help define these areas, Will and Amy created wide pathways using white stones, and planted small shrubs within those areas to create a more natural feel. These white pathways created elegant separations between the kids’ zone and the garden, as well as the pathway leading from the house.
Lastly, they created a pathway and patio leading from the master bedroom. By using grey and white stones to fill the Natural Paving pavers, they were able to create two distinctive areas, more for the adults to enjoy. They could easily use the patio outside the master bedroom for a tranquil retreat in the afternoon sun, or a private space to enjoy their morning weekend coffee.
Step-by-Step Installation Guide for Natural Paving
If you’re inspired by Will and Amy’s transformation and want to create your own outdoor oasis, click here to view our simple installation guide for Natural Paving.
Here is some other handy installation tips and tricks:
- Plan Your Space: Sketch a layout of your outdoor area, deciding where each section will be located.
- Install Edging: Place edging around the perimeter of each section to contain the stones. This helps define edges, especially if laying Natural Paving next to a grassed area. We recommend using PaveMaster Landscape Edging.
- Define Areas with Colour: Use different coloured stones to mark distinct sections of your yard.
Easy Maintenance with Natural Paving
One of the standout features of Natural Paving is its easy maintenance. The pebbles remain locked in place, requiring minimal upkeep. Will and Amy found that all they needed to do was occasionally sweep any stray stones back into place and blow away leaves during the autumn. The well-defined sections of their yard made lawn care straightforward, and the permeable nature of the paving ensured excellent drainage, preventing waterlogging even during heavy rains.
The Natural Paving Installation Result
Will and Amy couldn’t be happier with the results. They feel that Natural Paving has transformed their home into a relaxing and safe place to be. The installation was simple, and they can use the areas all year round, even after it rains, as the water quickly drains away. They love the aesthetic appeal and functionality that Natural Paving has brought to their backyard and would highly recommend it to anyone looking to upgrade their outdoor areas.
The transformation of Will and Amy’s outdoor space using Natural Paving showcases the versatility and beauty of pebbled paving installation. Their new, durable outdoor surfaces are not only aesthetically pleasing but also family-friendly and easy to maintain. If you’re considering a backyard makeover, Natural Paving permeable pavers are an excellent choice for creating distinct, functional, and beautiful outdoor spaces.